The first impression of your artwork matters most and in today’s age that will most likely be a photo. You may need to submit pieces to galleries, post on social media, send out newsletters, or update your website. Whatever it is, paintings are notoriously difficult to photograph but paying for professional shots for each piece quickly adds up. Thankfully, a small investment and a little practice will give you great results, perfect for online use and even small art prints or reproductions.
There is a lot of advice on the internet on how to minimize glare when photographing artwork, but cross-polarization is a method to completely eliminate glare.
Glare: Why Does It Happen?

You have likely experienced reflected-glare when photographing works. Fundamentally, the light is traveling from your light source and reflecting off the surface of your piece. Most of the light hitting your piece is being reflected as diffused, softer light, but if the angle of light hits your work just right, it causes a specular reflection, more commonly known as glare. If you ever have experienced a flash of light of a mirror, that’s glare. Similarly, the surface of your artwork is acting like a mirror and reflecting pure light; becoming visually overpowering in that one spot.
You can try minimizing it by using diffused lights or by setting your light sources at a shallow angle from the work, but frequently it is impossible to get rid of completely, especially if the surface has any texture or you have already varnished the work.
Cross Polarization And Why it Works
When you absolutely, positively, emphatically cannot have any glare, or specular reflections, we need to break out the science. You can think of light as acting as a wave, vibrating in any direction. If you pass light through a polarized filter, that sheet will only allow through light that is vibrating in a particular direction. For instance, if it is a vertical polarizing filter, only vertically vibrating light will pass through the filter and the rest will be filtered out.
Having a single polarized filter will not actually immediately fix the problem though, it ensures just that all the light hitting our artwork is vibrating in the same direction, but does hold the key to fixing our issue! Diffused reflections will change the angle of the light waves again, so they could be vibrating in any direction after they reflect off the surface. Specular reflections (glare), on the other hand, will maintain the vibration angle of the polarized light, in this case: vertically.
As we don’t want that glare, we can use a second polarizing filter, this time set horizontally, to filter out all the vertically-vibrating specular reflections, leaving only the diffused reflected light that is vibrating horizontally. This will completely eliminate all the specular reflections, leaving you with a nice, glare-free image.

My Setup
The science may be complex but the application is pretty simple. I’ve detailed how I built my cross-polarization setup below, but definitely don’t take how I did it as gospel, feel free to experiment and change as fits your needs.
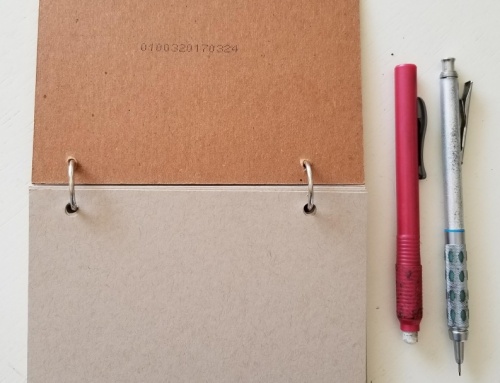
Recommended Materials & Tools
Location
The first thing you need is a really dark room. It makes no sense to invest time and energy in polarizing your primary light source if there’s a secondary light source (eg: window) reintroducing glare. I put a tinfoil in the windows of my garage to get it as dark as possible but if you can’t do that nor do you have a windowless basement room, wait until night time with your curtains drawn to get it as dark as possible.
Lights

I am using two GE HD “Refresh” LED bulbs as they’re relatively inexpensive and have a 90+ Color Rendering Index. Reportedly the Refresh bulbs have a 5000k color temperature but I found that they’re closer to 4400K for camera calibration purposes (make certain you don’t get Relax or Reveal models, as they’re both very warm at 2700k).
Since polarizing light (and then polarizing it again) reduces brightness, I went with the 100 watt equivalent bulbs initially but I would definitely consider getting brighter if I replace them. My goal was to evenly light my standard sized works. I placed the bulbs in lamps with 8.5” aluminum reflectors to keep things as bright as possible.
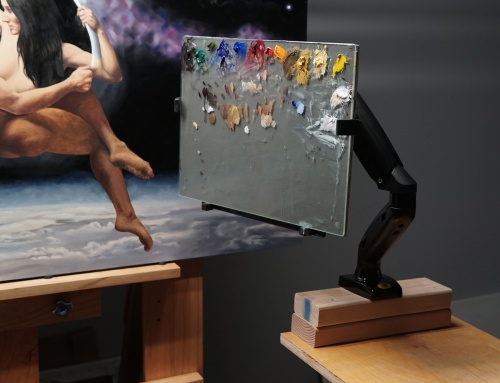
Housing the Polarizing Sheets
In the spirit of keeping this on a budget, I reused a couple cardboard boxes I had lying around. The boxes help prevent any unpolarized light from leaking around the polarizing filter, plus the polarizing sheets are semi-protected in a rigid structure. If you wanted to get fancier, a couple black plastic boxes/bins would work wonderfully.
To make things easier, I cut a 8”x10.5” hole in a sheet of cardboard first and taped my polarizing sheet to it. Then I placed that sheet of cardboard into the box and placed the box over the light assembly. The polarizing sheets I recommend are rectangular and designed to filter while in portrait orientation. As long as both are in the same orientation though, they will be filtering in the same direction. Don’t forget to gently remove the protective film before installation!
When placing your new light boxes, I still recommend trying to set them at angles 45 degrees or less to the surface of the artwork. This will reduce the amount of starting glare we’re trying to eliminate and using two lights will increase the brightness and reduce the possibility of shadows on the work itself (from paint texture for instance).

The Camera’s Polarizing Filter
A basic DSLR is recommended. I have heard of polarizing filters for cell phones but I have no experience with them personally. Plus, the image quality, ability to use a tripod, manual settings, and shot timer are all huge advantages. You’ll need to buy a filter specific to your camera’s lens size, but make certain you get a circular polarizer, not a linear one. Essentially they will both work the same when it comes to filtering the light, but your camera’s auto-focus will work best with a circular filter and might struggle to focus properly with a linear one.
Once you have the camera’s tripod lined up square with your artwork, look through the viewfinder and rotate the ring of your circular polarizing filter. If you pay careful attention, you’ll see that the artwork gets subtly darker or brighter as you spin the ring a quarter turn (this is especially noticeable if your camera has a live/screen view). When the view is brighter, this means the polarizer sheets and your camera’s filter are aligned the same direction (vertically) so rotate until it is darker and your camera’s filter is cross-polarized with the sheets on your lights.
Once you’ve found that sweet spot, snap your shot and bask in glory that is glare-free photography!


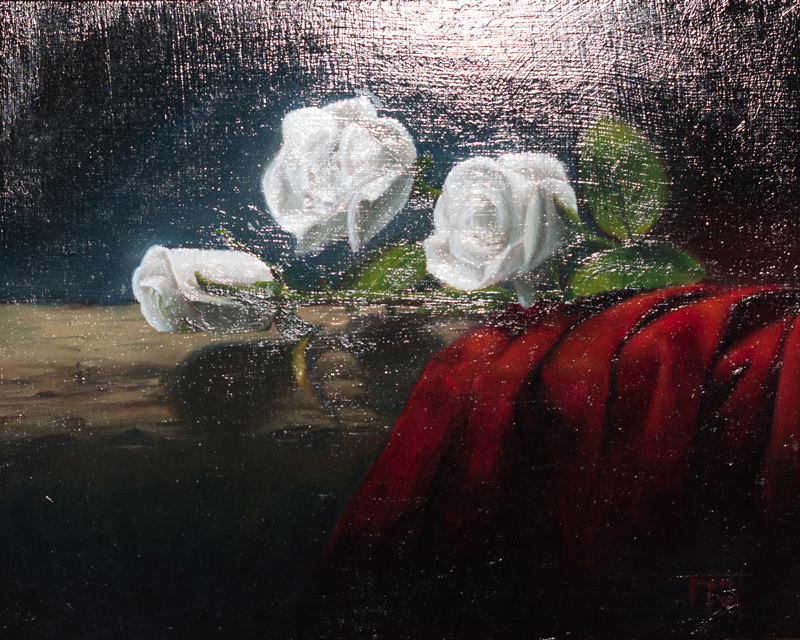
Before: artwork with glare

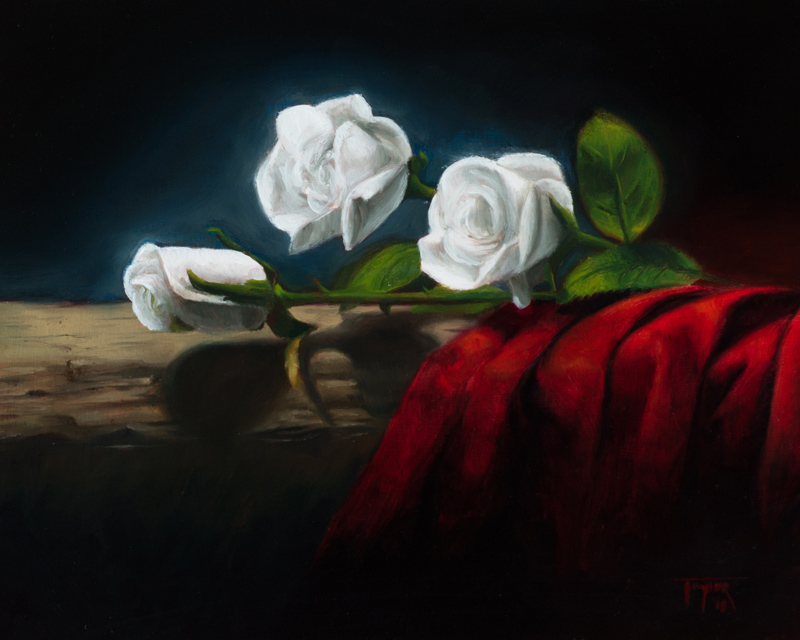
After: artwork with cross-polarization